Fixing missing files problem
Type sfc /scannow in the "Run" window with the XP CD in your top CD/DVD drive. Reboot when done
Shutdown XP Faster
Like previous versions of windows, it takes long time to restart or shutdown windows XP when the "Exit Windows" sound is enabled.
To solve this problem you must disable this useless sound.
Click Start button.
Go to settings > Control Panel > Sound, Speech and Audio devices > Sounds and Audio Devices > Sounds.
Then under program events and windows menu click on "Exit Windows" sub-menu and highlight it. Now from sounds you can select, choose "none" and then click Apply and OK.
Now you should see some improvements when shutting down your system.
Stop Password Expiration
After you have run Windows XP for a while, you may receive this message when you log on: "Your password will expire in 14 days.....". By default, Windows XP is set up with passwords which will expire after 42 days. And 14 days in advance, Windows will start warning you of this fact.
Go to Start > Run > type control userpasswords2
Select the Advanced tab in the User Accounts window.
Press the Advanced button below the Advanced user management header.
Select Users in the Local Users and Groups.
In the right pane, right-click the user name for which you want to change the setting, and select Properties.
On the General tab, check Password never expires.
Click Apply and OK (all the way out).
Breaking The XP Password
In case of user password boot the pc in safemode by pressing the F8 key and then selecting the Safe Mode option. You can now logon as an administrator and XP wont prompt for the password. Incase of an administrator account try rebooting the pc in DOS. access C:Windowssystem32configsam . Rename SAM as SAM.mj
Now XP wont ask for password next time You Login. Also
Go to the cmd prompt .
Type net user *.
It will list all the users.
Again type net user "administrator" or the name of the administrator "name" *.
e.g.: net user aaaaaa *(where aaaaaa is the name).
It will ask for the password.
Type the password and there you are done.
Logging In As Administrator:
Hold the Ctrl-Alt key and press Del twice. This will bring up the normal login and you can log on as Administrator.
To unhide the Administrator account so it does show up:
Start Regedit
Go to HKEY_LOCAL_MACHINE SOFTWARE Microsoft Windows NT CurrentVersion Winlogon SpecialAccounts UserList
Unhide the Administrator key by giving it a value of 1
Windows XP Tips & Tricks
Disable CD Autorun
1) Click Start, Run and enter GPEDIT.MSC
2) Go to Computer Configuration, Administrative Templates, System.
3) Locate the entry for Turn autoplay off and modify it as you desire.
How to Convert a FAT Partition to NTFS
To convert a FAT partition to NTFS, perform the following steps.
Click Start, click Programs, and then click Command Prompt.
In Windows XP, click Start, and then click Run.
At the command prompt, type CONVERT [driveletter]: /FS:NTFS.
Convert.exe will attempt to convert the partition to NTFS.
Boot Defragment
A very important new feature in Microsoft Windows XP is the ability to do a boot defragment. This basically means that all boot files are placed next to each other on the disk drive to allow for faster booting. By default this option is enabled but some upgrade users have reported that it isn't on their setup.
1. Start Regedit.
2. Navigate to HKEY_LOCAL_MACHINE\SOFTWARE\Microsoft\Dfrg\BootOptimizeFunction
3. Select Enable from the list on the right.
4. Right on it and select Modify.
5. Change the value to Y to enable and N to disable.
6. Reboot your computer.
Ping
In a previous tip, it was revealed how to continuously ping a host until stopped. Here are all of the ping options:
example .. In DOS .. c:>ping 192.168.0.1 -t
-t Ping the specifed host until interrupted
-a Resolve addresses to hostnames
-n count Number of echo requests to send
-l size Send buffer size
-f Set Don't Fragment flag in packet
-i TTL Time To Live
-v TOS Type Of Service
-r count Record route for count hops
-s count Timestamp for count hops
-j host-list Loose source route along host-list
-k host-list Strict source route along host-list
-w timeout Timeout in milliseconds to wait for each reply
Experiment to see how helpful these can be!
SATURDAY 30 MAY 2009
MAKE YOUR XP 100% GENUINE - This is really working
Basically we are going to change the product key of windows in a LEGAL WAY
certified by Microsoft itself.
This is 101% Genuine CD key For Windows Xp Sp2 Prof. which never expires...!
V2C47-MK7JD-3R89F-D2KXW-VPK3J
This above key can be used while installation of any windows xp prof. Sp2 to get it validated after installation.
--------------------------------------------------
Follow These Steps---:
1. Click Start, and then click Run.
Copy Paste this below command to check the activation status of your
windows in Run and hit Enter.
Command-: %systemroot%\system32\oobe\msoobe.exe /a
This would say Windows Is already activated. if not then jump to step 8.
2. Now again click Start and then click Run. In the Open box, type regedit, and then click OK.
3. In the left pane, locate and then click the following registry key:
HKEY_LOCAL_MACHINE\Software\Microsoft\WindowsNT\Cu rrent Version\WPAEvents
4. In the right pane, right-click OOBETimer, and then click Modify.
5. Change at least one digit of this value to deactivate Windows.(eg -: change any value lets say 93 to 67 etc)
6. Click Start, and then click Run.
7. In the Open box, type the following command, and then click OK.
%systemroot%\system32\oobe\msoobe.exe /a
8. Click Yes, I want to telephone a customer service representative to activate Windows, and then click Next.
9. Click Change Product key.
10. Type the new product key-: " V2C47-MK7JD-3R89F-D2KXW-VPK3J " in the New key boxes, and then click Update.
If you are returned to the previous window, click Remind me later, and then restart the computer.
11. Repeat steps 6 and 7 to verify that Windows is activated. You receive the following message:
Windows is already activated. Click OK to exit.
12. Click OK.
13. Now Click Here to validate your windows xp.
u must download & install the Microsoft WGA Plugin to validate the XP..Guys this really works...
MONDAY 23 MARCH 2009
ட்ரைவ் ஒன்றை மறைத்து வைப்பதெப்படி?
முக்கியமான தகவல்களை ஏனையோர் அணுகாமல் பாதுகாக்க விரும்புவோர்க்கு இது மிகவும் பயனுள்ள ஒரு குறிப்பு. விண்டோஸ் இயங்கு தளத்தில் போல்டர்களை மறைத்து (Hide) வைக்கும் முறையை நீங்கள் அறிந்திருக்கலாம். போல்டர்களை மறைத்து வைப்பது போன்று கணனியிலுள்ள ட்ரைவ்களையும் மறைத்து வைக்க முடியும். விண்டோஸில் இயங்கு தளம் மூலம் கணனியிலுள்ள எந்த ஒரு ட்ரைவையும் அடுத்த பயனர்களின் பார்வையிலிருந்து மறைத்து விடலாம். இதன் மூலம் உங்கள் அந்தரங்க தகவல்களுக்கு ஒரு பாதுகாப்புக் கிடைக்கிறது. ஒரே நேரத்தில் எல்லா ட்ரைவ்களையுமோ அல்லது குறிப்பிட்ட ஒரு ட்ரைவை மாத்திரமோ மறைத்து வைக்கலாம். அதற்கு நீங்கள் விண்டோஸ் ரெஜிஸ்ட்ரில் சிறிய மாற்றத்தைச் செய்து விட்டால் போதுமானது.
முதலில் விண்டோஸில் அட்மினிஸ்ட்ரேட்டராக லொக் - ஒன் செய்து கொள்ளுங்கள். அடுத்து ரன் (run) பொக்ஸில் regedit என டைப் செய்து ஓகே சொல்லுங்கள். திறக்கும் ரெஜிஸ்ட்ரி எடிட்டர் விண்டோவில் கீழே காட்டப்பட்டள்ள இடத்தை அணுகுங்கள்.
HKEY CURRENT USER/ Software/ Microsoft/ Windows/ Current Version/ Policies/ Explorer
இங்கு இறுதியாக Explorer ல் க்ளிக் செய்யுங்கள். அடுத்து விண்டோவின் வலப்புறம் ரைட் க்ளிக் செய்து புதிதாக No Drives எனும் பெயரில் DWORD பெறுனமானத்தை உருவாக்கிக் கொள்ளுங்கள். கணனியிலுள்ள ட்ரைவ் அனைத்தையும் மறைப்பதாயின் அதன் Value Data வாக 3FFFFFF எனும் பெறுமானத்தை வழங்குங்கள்.
அதே போன்று குறிப்பிட்ட ஒரு ட்ரைவை மாத்திரம் மறைப்பதாயின் அதாவது A, B, C, D, E, F, G, H என ஆங்கில எழுத்துக்கள் மூலம் குறிக்கப்படும் ட்ரைவ்களை மறைக்க 2, 4, 8, 16, 32, 64, 128 எனும் ஒழுங்கில் வழங்குங்கள். உதாரணமாக பி ட்ரைவை மறைத்து வைக்க வேண்டுமாயின் 32 எனும் இலக்கத்தை Value Data வாக வழங்க வேண்டும்.
அடுத்து ரெஜிஸ்ட்ரி எடிட்டர் விண்டோவை மூடிவிட்டு கணனியை மறுபடி இயக்க நீங்கள் மறைத்து வைத்த ட்ரைவை மை கம்பியூட்டர் விண்டோவில் பார்க்க முடியாது. மீண்டும் அதனைக் காண்பிக்க வேண்டுமானால் மேற்சொன்ன இதே வழியில் சென்று புதிதாக உருவாக்கிய ளிதீலிஞிளி பெறுமானத்தை அழித்து விட்டு கணனியை மறுபடி இயக்க வேண்டும்.
பாஸ்வேர்ட் மறந்துபோனால்
விண்டோஸ் எக்ஸ்பி இயங்கு தளத்தில் பயனர் கணக்கை (user account) உருவாக்கி அதனை எவரும் அணுகா வண்ணம் பாஸ்வர்ட் மூலம் பாதுகாப்பளிக்கவும் முடியும் என்பது நீங்கள் அறிந்த விடயமே. அப்படி நீங்கள் உருவாக்கும் பயனர் கணக்குக்குரிய பாஸ்வர்ட் ஒருவேளை மறந்து போனால் விண்டோஸில் டிபோல்டாக உருவாக்கப்படும் எட்மினிஸ்ட் ரேட்டர் (administrator) கணக்கு மூலம் லொக் ஓன் செய்து அதனை நீக்க முடியும். இந்த அட்மினிஸ்ரேட்டர் கணக்குக்குப் பாஸ்வர்ட் இட்டுக் கொள்வோரும் உண்டு. இப்போது அந்த அட்மினிஸ்ட்ரேட்டர் கணக்குக் குரிய பாஸ்வர்டும் மறந்து போனால் என்ன செய்வது? அதற்கும் ஒரு தீர்விருக்கிறது. எனினும் இந்த வழிமுறை ஓரளவு சிக்கலானது. விண்டோஸைப் புதிதாக நிறுவும் முறையை அறிந்திருப்போருக்கு இது இலகுவான விடயமே.
முதலில் கணனியை இயக்கி சிடியிலிருந்து பூட் ஆகுமாறு பயோஸ் (BIOS) செட்டப்பில் மாற்றி விடுங்கள். கணனியை மறுபடி இயக்கி விண்டோஸ் எக்ஸ்பீ சிடியை ட்ரைவிலிட் Press any key to boot from CD எனும் செய்தி திரையில் தோன்றும். அப்போது ஒரு விசையை அழுத்த சிடியிலிருந்து கணனி பூட் ஆக ஆரம்பிக்கும். இது விண்டோஸை நிறுவும் செயற்பாட்டில் முதற்படியாகும்.
இந்த செயற்பாட்டில் கணனியைப் பரிசோதித்து பைல்கள் லோட் செய்யப்பட்டதும் Licensing Agreement திரை தோன்றும். அப்போது F8 விசையை அழுத்தியதும் வரும் திரையில் புதிதாக விண்டோஸை நிறுவுவதா அல்லது ஏற்கனவே நிறுவப்பட்டுள்ளதை சரி செய்வதா (Repair) என வினவும். அப்போது கீபோர்டில் R கீயை அழுத்தி ஏற்கனவே நிறுவப்பட்டுள்ள விண்டோஸை சரி செய்வதற்கான விருப்பை தெரிவு செய்யவும்.
அடுத்து கணனி மறுபடி இயங்க ஆரம்பித்து (restart) ஒரு சில நிமிடங்களில் திரையின் இடது புறத்தில் Installing Devices எனும் செயற்பாடு நடைபெறக்காணலாம். இந்த இடத்தில்தான் நீங்கள் செயற்பட வேண்டியுள்ளது. இங்கு கீபோர்டில் Shift + F10 விசைகளை ஒரே நேரத்தில் அழுத்துங்கள். அப்போது திரையில் கமாண்ட் விண்டோ தோன்றும். கமாண்ட் ப்ரொம்டில் NUSRMGR. CPL. விஜிழி என டைப் செய்து எண்டர் கீயை அழுத்த கண்ட்ரோல் பேனலிலுள்ள User Accounts விண்டோ திறக்கக் காணலாம்.
இங்கு நீங்கள் விரும்பும் பயனர் கணக்குக்குரிய பாஸ்வர்டை மாற்றவோ நீக்கவோ முடியும்.
ஒரு யூசர் கணக்கில் நுளையும் போது அதாவது லொக் - ஒன் செய்யும் போது பாஸ்வர்டை வினவாமல் செய்ய அதே கமாண்ட் ப்ரொம்டில் Control user passwords 2 என டைப் செய்து எண்டர் கீயை அழுத்துங்கள்.
அப்போது ஒரு டயலொக் பொக்ஸ் தோன்றும். அங்கு அட்மினிஸ்ரேட்டர் கணக்குக்குரிய பாஸ்வர்டை மாற்றவோ அல்லது நீக்கவோ (Reset password) ரீசெட் பாஸ்வர்ட் பட்டனில் க்ளிக் செய்து மாற்றிக் கொள்ளலாம்.
மாற்றங்கள் செய்த பின்னர் அந்த டயலொக் பொக்ஸை மூடிவிட்டு விண்டோஸ் ரிபெயாரிங் செயற்பாடு பூர்த்தியாகும் வரை அதனைத் தொடர வேண்டும்.
SATURDAY 6 DECEMBER 2008
Find Windows XP Product Key from the Windows XP CD
1) Insert Windows XP cd into a working computer.
2) Exit the Autorun introduction.
3) Open "My Computer"
4) Right Click on the Windows XP cd-rom drive and select explore.
5) Open the USWXP32P_ZX folder.
6) Open the sysprep folder.
7) Open unattend.txt
2) Exit the Autorun introduction.
3) Open "My Computer"
4) Right Click on the Windows XP cd-rom drive and select explore.
5) Open the USWXP32P_ZX folder.
6) Open the sysprep folder.
7) Open unattend.txt
Your CD's product key is contained within theunattend.txt file.
Note: On some system disks, USWXP32P_ZX is a hidden folder. If you cannot locate the folder, you may also search forunattend.txt and mark "Search Hidden Files".
As best I am aware, this should work on Microsoft Windows XP Home, Windows XP Professional, and OEM versions of Windows XP from restore disks.
MONDAY 17 NOVEMBER 2008
Pdf files or ebooks can be listened instead of reading
Pdf files or ebooks can be listened instead of reading the whole document without using any extra/additional software
Open your pdf document/ebook in acrobat reader
and then press following key
Open your pdf document/ebook in acrobat reader
and then press following key
To hear the whole pdf -> ctrl+shift+b
To hear only the page -> ctrl+shift+v
To resume -> ctrl+shift+c
To stop -> ctrl+shift+e
To hear only the page -> ctrl+shift+v
To resume -> ctrl+shift+c
To stop -> ctrl+shift+e
The talking person is Mr Sam who has given his voice in xp
The engine is provided by windows XP
Movie In Windows XP - Hidden Star Wars
1. ur operating system should be XP.
2. then connect to the internet.
3. then finally type " telnet towel.blinkenlights.nl " into the RUN menu.
2. then connect to the internet.
3. then finally type " telnet towel.blinkenlights.nl " into the RUN menu.
Here is a list of commands that you can run off from the Run Command prompt in XP:
Go to Start Menu > Run>and type in the command to run
undefined
Application = Command
Accessibility Controls = access.cpl
Add Hardware Wizard = hdwwiz.cpl
Add/Remove Programs = appwiz.cpl
Administrative Tools = control admintools
Automatic Updates = wuaucpl.cpl
Bluetooth Transfer Wizard = fsquirt
Calculator = calc
Certificate Manager = certmgr.msc
Character Map = charmap
Check Disk Utility = chkdsk
Clipboard Viewer = clipbrd
Command Prompt = cmd
Component Services = dcomcnfg
Computer Management = compmgmt.msc
Date and Time Properties = timedate.cpl
DDE Shares = ddeshare
Device Manager = devmgmt.msc
Direct X Control Panel (If Installed)* = directx.cpl
Direct X Troubleshooter = dxdiag
Disk Cleanup Utility = cleanmgr
Disk Defragment = dfrg.msc
Disk Management = diskmgmt.msc
Disk Partition Manager = diskpart
Display Properties = control desktop/desk.cpl
Dr. Watson System Troubleshooting Utility = drwtsn32
Driver Verifier Utility = verifier
Event Viewer = eventvwr.msc
File Signature Verification Tool = sigverif
Findfast = findfast.cpl
Folders Properties = control folders
Fonts = control fonts
Fonts Folder = fonts
Free Cell Card Game = freecell
Game Controllers = joy.cpl
Group Policy Editor (XP Prof) = gpedit.msc
Hearts Card Game = mshearts
Iexpress Wizard = iexpress
Indexing Service = ciadv.msc
Internet Properties = inetcpl.cpl
IP Configuration = ipconfig
Java Control Panel (If Installed) = jpicpl32.cpl
Java Application Cache Viewer (If Installed) = javaws
Keyboard Properties = control keyboard
Local Security Settings = secpol.msc
Local Users and Groups = lusrmgr.msc
Logs You Out Of Windows = logoff
Micr@s@ft Chat = winchat
Minesweeper Game = winmine
Mouse Properties = control mouse
Mouse Properties = main.cpl
Network Connections = control netconnections
Network Connections = ncpa.cpl
Network Setup Wizard = netsetup.cpl
Notepad = notepad
Nview Desktop Manager (If Installed) = nvtuicpl.cpl
Object Packager = packager
ODBC Data Source Administrator = odbccp32.cpl
On Screen Keyboard = osk
Opens AC3 Filter (If Installed) = ac3filter.cpl
Password Properties = password.cpl
Performance Monitor = perfmon.msc
Performance Monitor = perfmon
Phone and Modem Options = telephon.cpl
Power Configuration = powercfg.cpl
Printers and Faxes = control printers
Printers Folder = printers
Private Character Editor = eudcedit
Quicktime (If Installed) = QuickTime.cpl
Regional Settings = intl.cpl
Registry Editor = regedit
Registry Editor = regedit32
Remote Desktop = mstsc
Removable Storage = ntmsmgr.msc
Removable Storage Operator Requests = ntmsoprq.msc
Resultant Set of Policy (XP Prof) = rsop.msc
Scanners and Cameras = sticpl.cpl
Scheduled Tasks = control schedtasks
Security Center = wscui.cpl
Services = services.msc
Shared Folders = fsmgmt.msc
Shuts Down Windows = shutdown
Sounds and Audio = mmsys.cpl
Spider Solitare Card Game = spider
SQL Client Configuration = cliconfg
System Configuration Editor = sysedit
System Configuration Utility = msconfig
System File Checker Utility = sfc
System Properties = sysdm.cpl
Task Manager = taskmgr
Telnet Client = telnet
User Account Management = nusrmgr.cpl
Utility Manager = utilman
Windows Firewall = firewall.cpl
Windows Magnifier = magnify
Windows Management Infrastructure = wmimgmt.msc
Windows System Security Tool = syskey
Windows Update Launches = wupdmgr
Windows XP Tour Wizard = tourstart
Wordpad = write
THURSDAY 9 OCTOBER 2008
Does your Internet Explorer save images in the bitmap format?
Does your Internet Explorer sometimes save image files as bitmaps (*.bmp) even though you know the original image is not a bitmap?
Don't worry, your temporary Internet files folder is just too full. Simply delete the temporary files by going to Internet Options and pressing the "Delete Files..." button under "Temporary Internet Files".
Don't worry, your temporary Internet files folder is just too full. Simply delete the temporary files by going to Internet Options and pressing the "Delete Files..." button under "Temporary Internet Files".
Enable 128x128 icons in Windows XP
Windows XP has two settings for icons: normal and large. Normal icons are 32x32 and large icons are 48x48. Use these directions to get 128x128 32-bit icons.
Open registry editor and locate:
HKEY_CURRENT_USER\Control Panel\Desktop\WindowMetrics
Change the following keys to:
IconSpacing = -2400
IconVerticalspacing = -2400
Shell Icon BPP = 32
Shell Icon Size = 128
You may want to keep a backup of the old values.
Open registry editor and locate:
HKEY_CURRENT_USER\Control Panel\Desktop\WindowMetrics
Change the following keys to:
IconSpacing = -2400
IconVerticalspacing = -2400
Shell Icon BPP = 32
Shell Icon Size = 128
You may want to keep a backup of the old values.
Auto shut down your computer
In Cmd, type shutdown -t nnn. Nnn represents seconds. All you have to do is convert the hours to seconds. For example, if you want to turn off your computer in 2 hours, then you go to Cmd and type shutdown -t 7200 because 2 hours times 3600 seconds (the number of seconds in one hour) equals 7200 seconds. It's that easy!
Change drive letters in Windows XP
Have you ever wanted to change a drive letter from D to E? Well, it is easy to do so in Windows XP. Just follow these simple steps:
1. Go to System Administrative Tools (if you can't find it in the Start menu, you need to turn it on in Start Menu Properties).
2. Open Computer Management.
3. From the left menu, choose Disk Management under Storage.
4. Right click on the drive whose letter you would like to change and select "Change drive letter and paths..."
5. Select the drive letter you want.
Remember: It is not recommended to change the drive letter of a drive if the drive contains system files or has programs installed on it.
FRIDAY 13 JUNE 2008
How To View Super Hidden Files
Hidden files and folder can be made visible by going through the folder options and selecting View hidden folders and files. Now you will be able to see all the hidden files and folders. But do you know that there are super hidden files which aren’t shown when you enable this option? You can view these files by setting the below registry value to 1.
[HKEY_CURRENT_USER\Software\Microsoft\Windows\CurrentVersion\Explorer\Advanced]
“SuperHidden” = 1
Once you make changes to the registry you need to reboot to make this setting work.
[HKEY_CURRENT_USER\Software\Microsoft\Windows\CurrentVersion\Explorer\Advanced]
“SuperHidden” = 1
Once you make changes to the registry you need to reboot to make this setting work.
Change The Color Of Your folders With Rainbow Folder
How about changing the colors of your favorite folders as you like? With Rainbow folders you can colorize your folders! For instance you might like to assign green for work, red for photos, blue for games, etc. The biggest advantage of doing this will speed up your navigation among thousands of folders located on your hard drive.
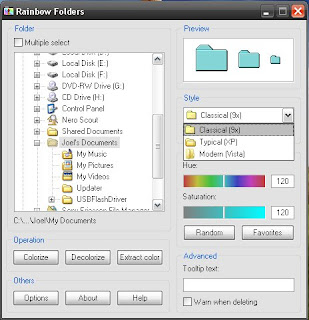
You can colorize as many folders as you like with this application. Such colorized folders are visible in every Explorer window, every open/save dialog and in every folder selection tree as seen in many programs. Moreover, you can manage your favorite colors and colorize folders using Explorer context menu item. If you want to decolorize them then you can do so easily from the application.
Rainbow folders is a free application and can be downloaded from below:
Link
How to Lock and Hide Folders without using any Software
We usually lock folders using softwares but have you ever wondered that you can lock a folder without actually using a software? Well, if you haven’t it is possible and pretty easy too. The idea behind it is simple, here’s how you do it:
1. Firstly open Notepad and paste the following code:
CODE:
cls
@ECHO OFF
title Folder Locker
if EXIST “Control Panel.{21EC2020- 3AEA-1069- A2DD-08002B30309 D}” goto UNLOCK
if NOT EXIST Locker goto MDLOCKER
:CONFIRM
echo Are you sure u want to Lock the folder(Y/N)
set/p “cho=>”
if %cho%==Y goto LOCK
if %cho%==y goto LOCK
if %cho%==n goto END
if %cho%==N goto END
echo Invalid choice.
goto CONFIRM
:LOCK
ren Locker “Control Panel.{21EC2020- 3AEA-1069- A2DD-08002B30309 D}”
attrib +h +s “Control Panel.{21EC2020- 3AEA-1069- A2DD-08002B30309 D}”
echo Folder locked
goto End
:UNLOCK
echo Enter password to Unlock folder
set/p “pass=>”
if NOT %pass%==type your password here goto FAIL
attrib -h -s “Control Panel.{21EC2020- 3AEA-1069- A2DD-08002B30309 D}”
ren “Control Panel.{21EC2020- 3AEA-1069- A2DD-08002B30309 D}” Locker
echo Folder Unlocked successfully
goto End
:FAIL
echo Invalid password
goto end
:MDLOCKER
md Locker
echo Locker created successfully
goto End
:End
2. In the above code, change “type your password here” to your preferred password to reflect your password.
NOTE: You need to remember this as it will be required to unlock the folder.
3. Now Save the file as locker.bat
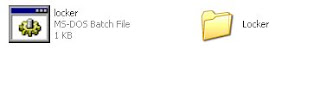
4. Now double click on locker.bat to create a folder. Once the folder is created you can copy files into it.
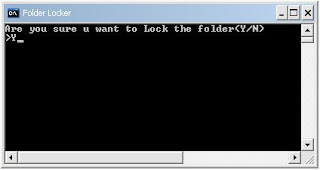
5. Once done, to lock it double click on locker.bat. It will ask you “Are you sure you want to lock the folder ” type “y” and hit enter. Your folder will be locked and you won’t be able to see it unless you unlock it.
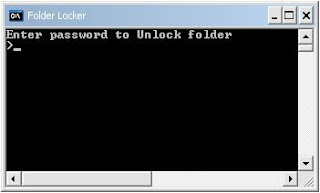
6. Now if you want to unlock the folder double click on the locker.bat and enter the password and hit enter, the locked folder will reappear.
IMPORTANT NOTE: For security reasons it’s better to move the locker.bat to a safe location after you have successfully locked the folder so that no one finds it. This will ensure that no one can open the locked folder. If the locker.bat is visible people can open it with notepad and view the password. Another thing is that even if you delete the locker.bat after your folder is locked the folder won’t get deleted.
Hope you liked it, locking folders is pretty easy isn’t it?
Make Folders and Shortcut Icons Invisible in Vista and XP
Making Folders invisible:
1. First of all create a new folder.
2. Now highlight the folder and Click ‘F2′ button to rename it. Hold the ‘Alt’ key and type in 0160. Press Enter. You’ll notice that the folder will have no name.
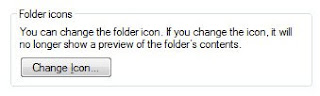
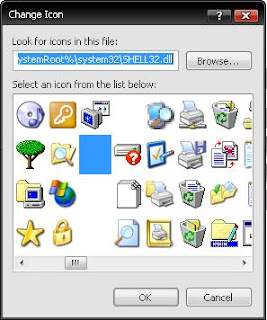
3. The final step is to change the icon in order to make it invisible. Right click on the folder and go to Properties > Customize > Change the icon > Select the blank one (there are about three of them, choose any one) > Ok.
Making Shortcuts invisible:
1. Highlight the icon and Click ‘F2′ button to rename it. Hold the ‘Alt’ key and type in 0160. Press Enter. You’ll notice that the icon will have no name.
2. Right click on the shortcut and go to Properties > Shortcut > Change icon… > Select the blank one (there are about three of them, choose any one) > Ok.
Now unlike in folders you’ll notice that shortcuts have arrows which still don’t go off. You need to download a small tool- TweakUI in order to remove it.
3. Download TweakUI from here ( size:147KB) and install it.
4. Now start the program and go to Explorer> Shortcut> Shortcut overlay.
5. Select the shortcut overlay to ‘None’ then click ‘Ok’
6. That’s it now you’ll find your shortcut icon invisible.
If you can’t seem to get it right feel free to comment here, I’ll try my best to help you out.
1. First of all create a new folder.
2. Now highlight the folder and Click ‘F2′ button to rename it. Hold the ‘Alt’ key and type in 0160. Press Enter. You’ll notice that the folder will have no name.

3. The final step is to change the icon in order to make it invisible. Right click on the folder and go to Properties > Customize > Change the icon > Select the blank one (there are about three of them, choose any one) > Ok.

Making Shortcuts invisible:
1. Highlight the icon and Click ‘F2′ button to rename it. Hold the ‘Alt’ key and type in 0160. Press Enter. You’ll notice that the icon will have no name.
2. Right click on the shortcut and go to Properties > Shortcut > Change icon… > Select the blank one (there are about three of them, choose any one) > Ok.
Now unlike in folders you’ll notice that shortcuts have arrows which still don’t go off. You need to download a small tool- TweakUI in order to remove it.
3. Download TweakUI from here ( size:147KB) and install it.
4. Now start the program and go to Explorer> Shortcut> Shortcut overlay.
5. Select the shortcut overlay to ‘None’ then click ‘Ok’
6. That’s it now you’ll find your shortcut icon invisible.
If you can’t seem to get it right feel free to comment here, I’ll try my best to help you out.
No comments:
Post a Comment